


Grandstream's HT series of Analog Telephone Adapters (ATAs) offers a ton of features at an affordable price point. They are trusted and deployed by some of the world's largest service providers. The HT813 is a 1-port FXS, 1-port FXO gateway with a two-port gigabit ethernet router. It supports up to 2 SIP accounts.
Minimum supported firmware: v1.0.1.2
First Login
When first configuring your HandyTone, you must connect your computer to its LAN port and access its web interface at 192.168.2.1. If you'd like to open up the WAN port for administrative access, which is completely optional, go to the "Basic Settings" tab and change the following settings:
Disable Telnet: No
WAN Side Web/SSH Access: Yes
Reply to ICMP on WAN port: Yes


Next, update to the latest firmware for your HandyTone before connecting to our service. You can download the current production release from the link above. Once downloaded, you'll navigate to "Advanced Settings" and click the "Upload from Local Directory" button. Select the file you downloaded from Grandstream's website, and then click "Apply" once this has completed your device will reboot. You can then move on to the steps below.

SIP Registration
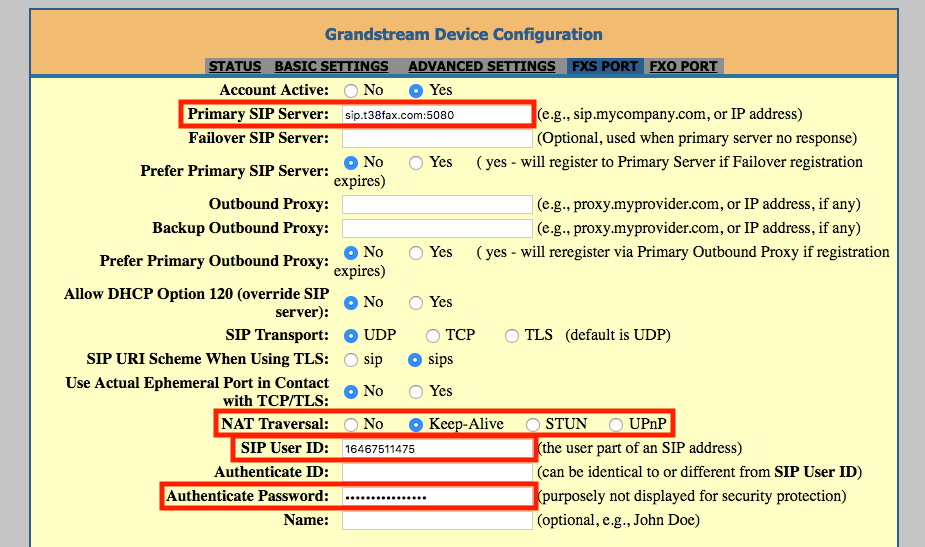
Select "FXS Port" from the primary menu, and and configure the following options for your SIP Registration:
Primary SIP Server: sip.t38fax.com:5080 help
NAT Traversal: Keep-Alive
SIP User ID: SIP Username help
Authenticate Password: SIP Password (will be blanked out when saved) help
Network Settings
Scroll down and configure the following options:
Register Expiration: 5
Local SIP Port: 5080 - If you have more than one device at a site, each device at a site should have a unique port >= 5080.
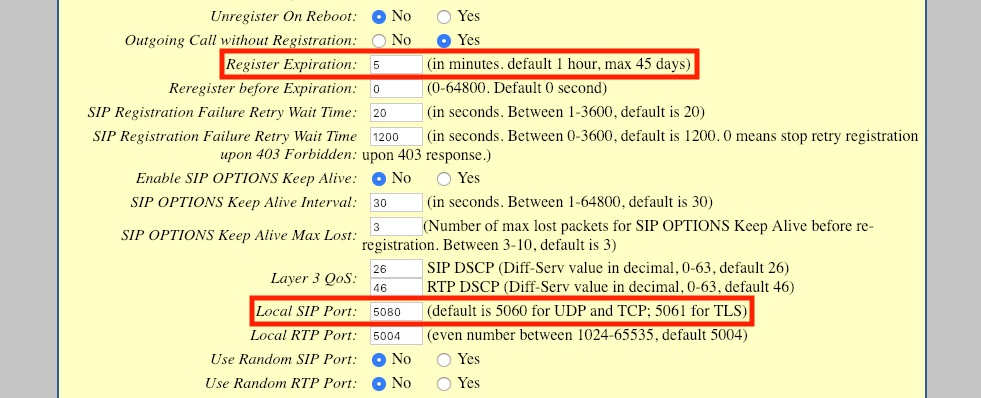
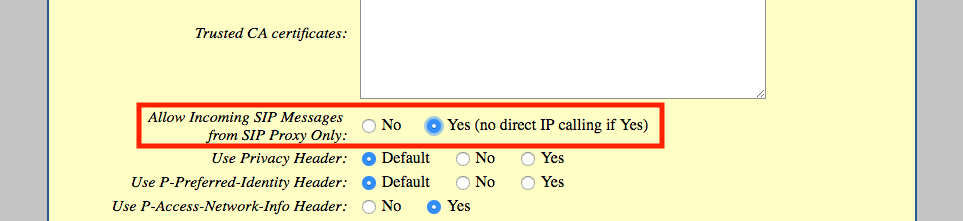
Allow Incoming Packets from SIP Proxy Only: Yes
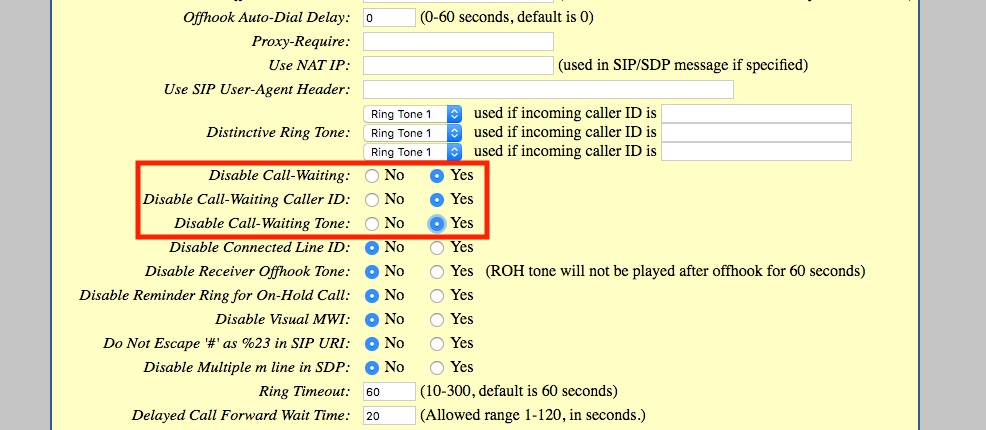
Feature Settings
Scroll down and configure the following options:
Disable-Call-Waiting: Yes
Disable-Call-Waiting-Caller-ID: Yes
Disable-Call-Waiting-Tone: Yes
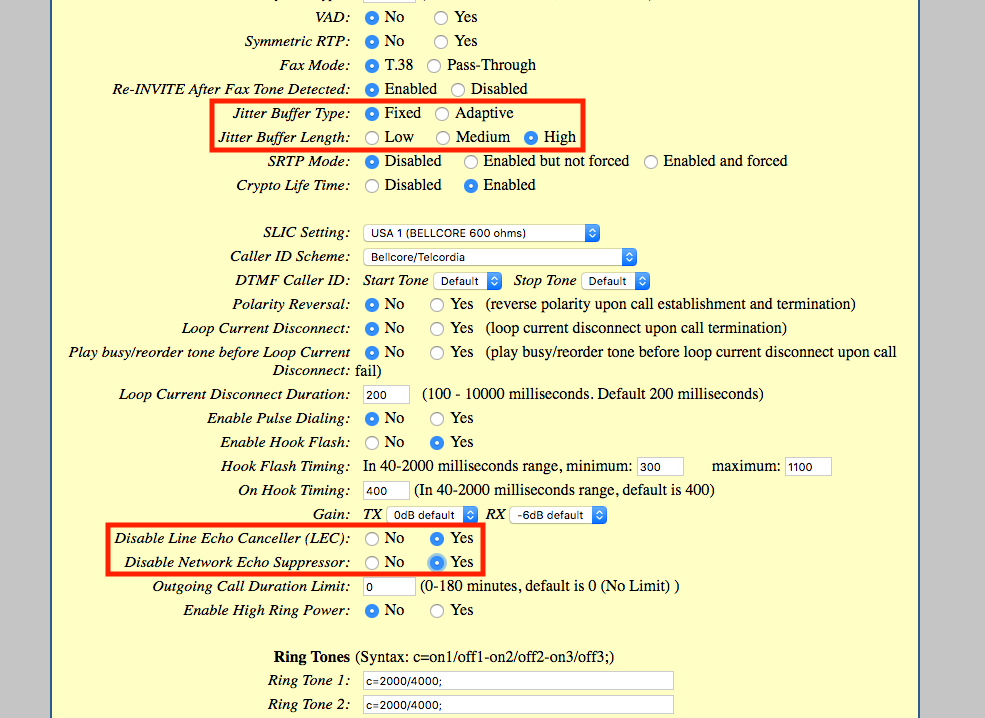
Fax Settings
Finally, configure the following T.38 specific options further down the screen:
Jitter Buffer Type: Fixed
Jitter Buffer Length: High
Disable Line Echo Canceller (LEC): Yes
Disable Network Echo Suppressor: Yes
Fax Machine
Finally, configure your fax machine to work properly with your Power-T.38 SIP Trunk. Review our Recommended Fax Machine Settings for details.
Why 5080? Learn More
Enter your SIP Username here. (This should be a DID assigned to your account that is available for registration. IE: 18043027000)
Still Confused? Learn More!
Enter the SIP Password for the SIP Username you entered above.
Still Confused? Learn More!
