

This is the Obihai ATA Device(s) advanced configuration guide, which will help you configure advanced routing parameters and configuration scenarios for the OBi Family of Analog Telephone Adapters & Gateways
Overview
In some deployment scenarios, it may be desirable to consolidate a group of DID's under a single SIP registration. This allows you to not only consolidate your DID's, but the way in which those DID's are billed as well. With this method, you have the flexibility to route/assign DIDs as your deployment may require, while taking advantage of additional cost savings in the process.
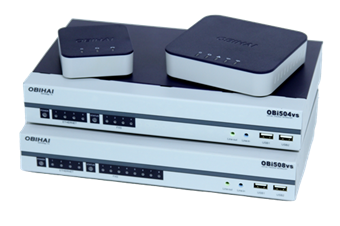
We've outlined this sort of scenario in this configuration guide for the Obihai family of analog telephone adapters (ATAs) and FXS gateways. As always, should you have any trouble with this configuration guide or need any other assistance, be sure to open a ticket and one of our Engineers will be happy to help you resolve any issues you may be having. For the purposes of this guide, we will be using an Obihai OBi508vs, however this guide can be applied to any Obihai multi-port analog telephone adapter and/or gateway.
Table of Contents
7-Digit Dialing
If you want to use 7-digit dialing, navigate to Service Providers > ITSP Profile A General and locate the DigitMap parameter. The DigitMap's default value will look like this:
(1xxxxxxxxxx|<1>[2-9]xxxxxxxxx|011xx.|xx.|(Mipd)|[^*#]@@.)
Add <1215>xxxxxxx| , replacing "215" with your desired area code, on the front of the string but inside the parentheses, so it looks like this:
(<1215>xxxxxxx|1xxxxxxxxxx|<1>[2-9]xxxxxxxxx|011xx.|xx.|(Mipd)|[^*#]@@.)
If you plan on doing a provisioned deployment, see the section below (Provisioning).
Provisioning
You can use the OBiTALK portal to provision your ATAs. This is useful if you have a number of ATAs/gateways that you would like to connect to us directly. Note that we've included two templates here: one for a single line ATA and one for a multi-line ATA. Your choice in template should be based on how many lines you plan to use on the device, not how many it supports. Download them here:
We've also included in these templates the config option for 7-digit dialing. If you don't want to include the 7 digit dialing config in your profile, you can remove the following lines:
<O>
<N>VoiceService.1.VoiceProfile.1.</N>
<P><N>DigitMap</N><V>(<1559>xxxxxxx|1xxxxxxxxxx|<1>[2-9]xxxxxxxxx|011xx.|xx.|(Mipd)|[^*#]@@.)</V></P>
</O>Go to the Base Profile Manager in the portal, select an empty non-zero profile, and paste the template in. Assign to your newly configured Base Profile to the ATA, then click "Reset Cloud Configuration" to clear any previous config info from the ATA.

Once this is done, you will have to configure all ATA-specific information manually:
- Single Line: Trunk ID, password (see your device's config guide)
- Multiple Lines: Single Line requirements, plus inbound and outbound routing (see below)
Multiple Fax Machines Per ATA
(NOTE: Pre-2018 accounts may need the T38Fax support team to need to enable a feature on your Power-T.38 account to support this method of routing. Contact us by email or ticket to request this feature be enabled on your account.)
Although you can configure each ATA port to a separate T38Fax trunk, each trunk costs $7/month. It's less expensive to use only one trunk per ATA, and configuring the ATA to give each port its own dedicated number for inbound and outbound use. This guide covers how to set this up. If you're using the provisioning section above, you will only need to set up the inbound and outbound call routing, so you can follow the provisioning section first and then skip to step 3 in this section.
Pre-Config
Before following the multi-line config instructions, you will need to configure your ATA or gateway according to the standard configuration guide. See the corresponding device guide below to get started:
OBi202 Configuration Guide
OBi302 Configuration Guide
OBi504vs Configuration Guide
OBi508vs Configuration Guide
Adding Another Line
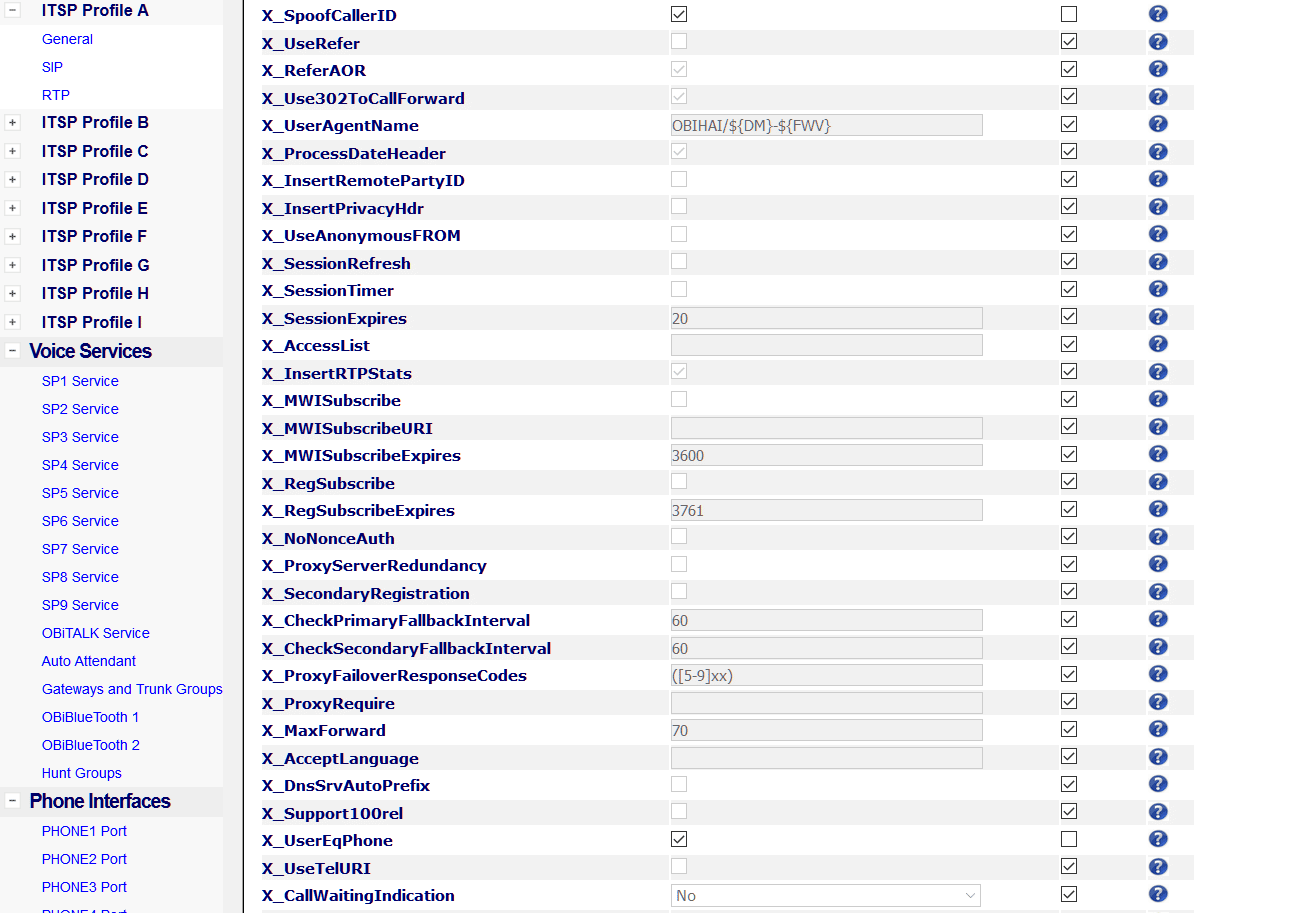
1. Select the associated ITSP Profile (we used profile "A") and configure the following options:
X_SpoofCallerID: True (Check the Box)
X_UserEqPhone: True (Check the Box)
Submit your changes, you may need to reboot the device if prompted.
2. Select the SP Service that corresponds to the ITSP Profile above, we used SP1 Service in this example. Here is where we will configure the inbound call route to recognize the called number, and route to correctly route the call to the corresponding interface that your DIDs are assigned to. As a reminder, we are using the following numbers in our example: 18043027000 & 18043027001, with the number ending in 7000 being the primary number on this trunk and is used for registration.
Under "X_InboundCallRoute" we have configured the following route:
{>(@.8043027000):ph1},{>(@.8043027001):ph2}
How does this work exactly? Let's break it down for clarification. Curly brackets { } are used to enclose each rule, each rule is separated by a comma. Adding > to the front of the rule specifies that we're performing our pattern recognition on the number being called (Your phone numbers). We've enclosed two additional characters before the number: @. This syntax will match any number of characters before the last 10 digits of the called number (Which will recognize these calls with or without a 1). After closing the parenthese we then simply define which port to send the call to, such as :ph1
See the Screenshot below for an example:
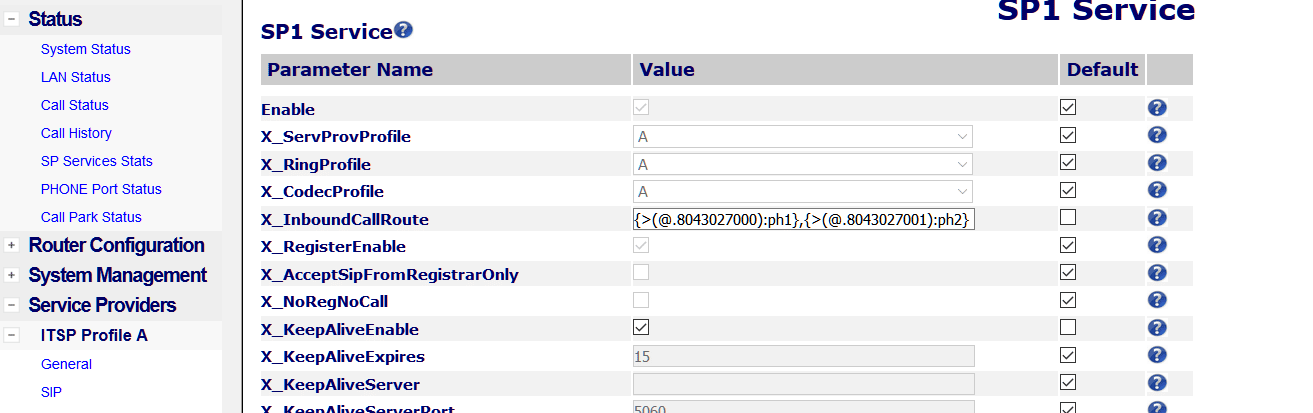
Be sure to submit your changes, and reboot if prompted.
3. Finally, we'll need to also configure an Outbound rule, so that we can both send and receive faxes.
For line one, add: {(Mpli):pli(18043027000>$2)}, to the Front of the existing values.
For line two, add: {(Mpli):pli(18043027001>$2)}, to the Front of the existing values.
NOTE: The trailing comma is essential, and separates additional rules provided by default.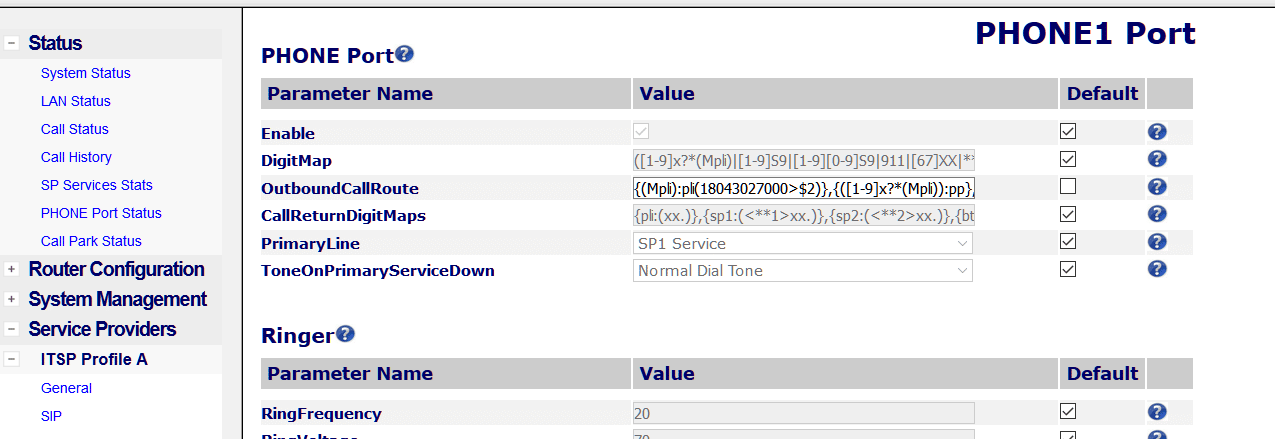
That's it! Your calls should route accordingly! Additional lines can be configured by duplicating the process found in this guide.

