AudioCodes' MediaPack 11x series of Analog VoIP Gateways are cost-effective, stand-alone VoIP gateways that provide superior voice technology for connecting legacy telephones, fax machines and PBX systems with IP telephony networks and IP-based PBX systems. We have included a configuration guide below designed to help you configure your Audiocodes MediaPack MP11x system to use your SIP trunk account from T38fax.com!
This guide assumes that you have already configured your device to work within your network. As much as we can, we've separated this guide into sections to correspond with the Audiocode's web interface configuration system. However, some important options are accessible only through other means. For these sections we edit the config file directly. Always make sure that you follow the on-screen prompts when asked to save your configuration and/or reboot the system.
INI Config File
Getting the Config File
On the top menu bar, select "Save Configuration File."

Select "Save INI File."

Modifying the Config File
Open the INI file in Notepad or your favorite text editor and make the following additions, along with the codec change to CodersGroup0:
[Voice Engine Params]
FaxRelayRedundancyDepth = 2
NoOpEnable = 1
[SIP Params]
MAXDIGITS = 11
ENABLECALLWAITING = 0
LOCALSIPPORT = 5080
SIPDESTINATIONPORT = 5080
ENABLEHOLD = 0
T38USERTPPORT = 1
ISFAXUSED = 1
T38FAXSESSIONIMMEDIATESTART = 2
[ CodersGroup0 ]
CodersGroup0 0 = "g711Ulaw64k", 20, 0, -1, 0;
[ \CodersGroup0 ]

Applying the Config File to the Unit
Save the file and upload it to the unit from the "Save INI File" screen.

SIP Settings
Control Network > Proxy Sets Table
Here, we'll add a definition to the Proxy Sets Table for the gateway to find our SIP service, and register to it. (Credentials are added later in this guide.) Add sip.t38fax.com to your #1 Proxy Address, and assign it a UDP Transport type. See the screenshot below:

SIP Definitions > Proxy & Registration
Here is where we'll define the method in which we'll register with your T38fax.com SIP Trunk account. Set the following options:
Use Default Proxy: Yes
Enable Registration: Enable
We'll set the username and password later on in this configuration guide, but at this point your configuration should match the screenshot below:

Call Routing
GW and IP to IP > Hunt Group > Endpoint Phone Number
Replace the phone number here with your T38fax.com DID, otherwise your settings should match:

GW and IP to IP > Routing > IP to Hunt Group Routing
Again, your settings should match the screenshot below:

Authentication
GW and IP to IP > Analog Gateway > Authentication
Complete this section with your T38fax.com DID and Password to register to your account:

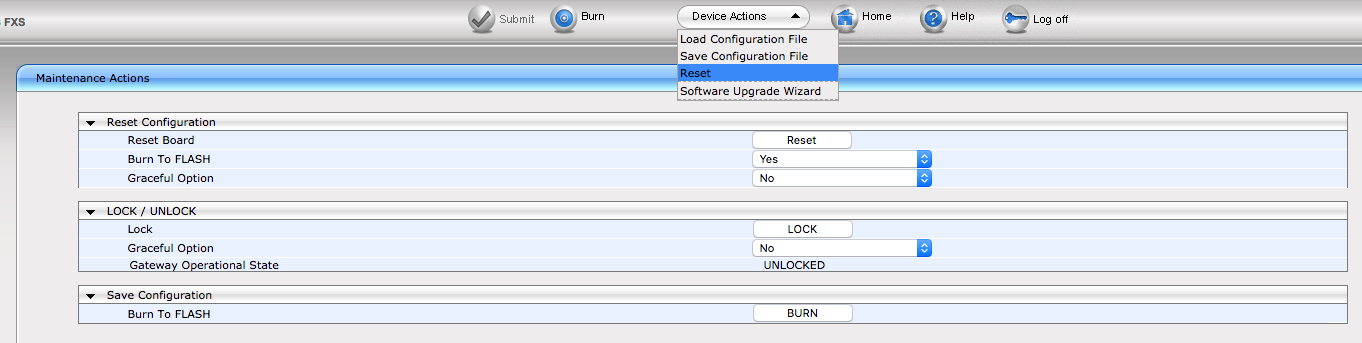
Save & Reboot
Go to the top menu bar again and select "Reset" from the dropdown menu (highlighted in the screenshot). Press the Reset button on that page.